Hi friends!
We all love a good before and after, and I promise this one doesn’t disappoint.
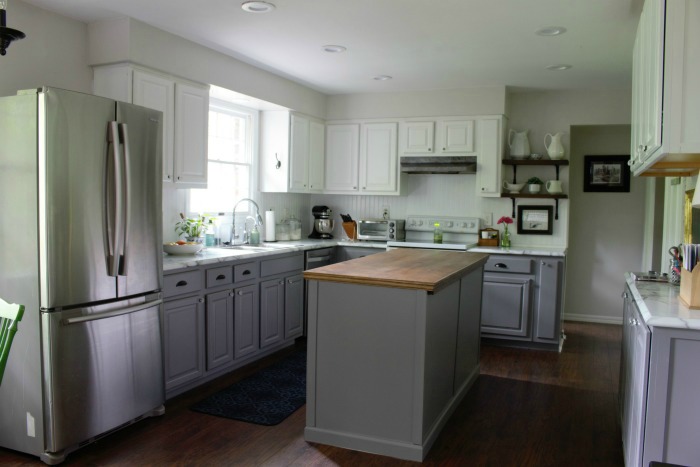
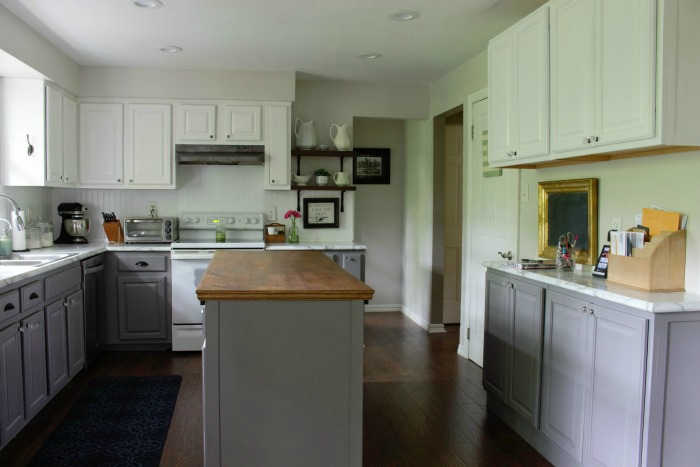
We have made it to the end. The kitchen is finally finished!! It’s been a long process, but I couldn’t be happier with the result. So let’s take a little walk through and I’ll show you all the projects along the way.
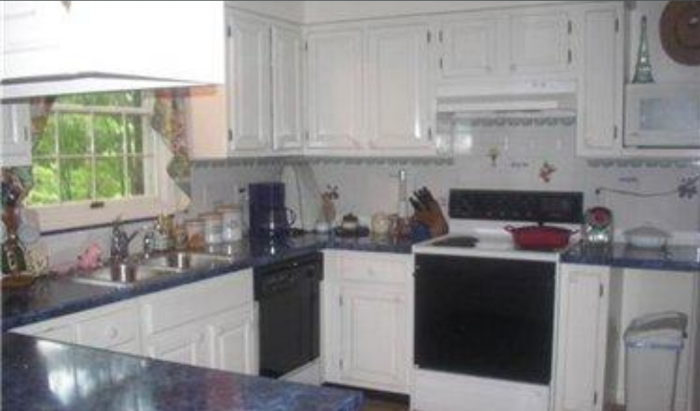
You can’t start anywhere without looking at the beginning. The photo above is the listing photo from when we bought the house 5 years ago. It had dated white cabinets, blue counter tops and fruit and vegetable tiled back splash.
I did a mini makeover at the time, painted the room, covered the backsplash with beadboard, painted the cabinets a fresh white and took out the cabinets that separated the room.
Then a couple years ago I painted over the blue counter tops with chalk board paint. All these were little band aids that helped us live with it. Then one night we took the plunge and knocked a hole in the ceiling.

First things first were demo. We rearranged the room switching the fridge to the other side, knocking out the bulkheads, and removing a pantry and a peninsula. Already it made it feel so much bigger!
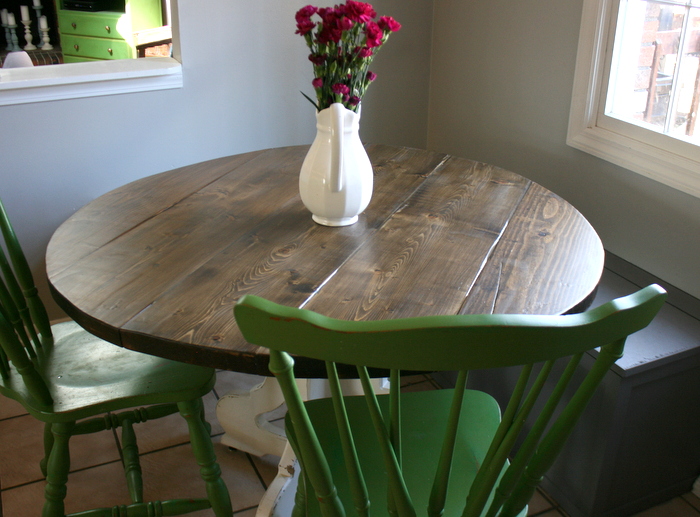
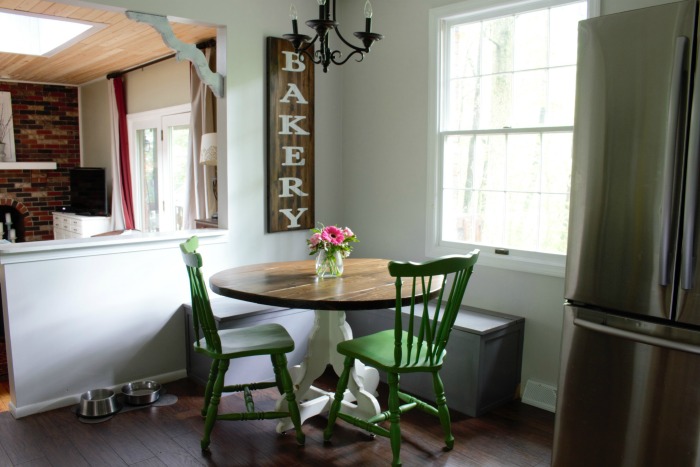
Next up I tackled building a custom banquette, to add seating to this corner and allow the table to be pushed back a bit. It’s a great spot for extra storage now!
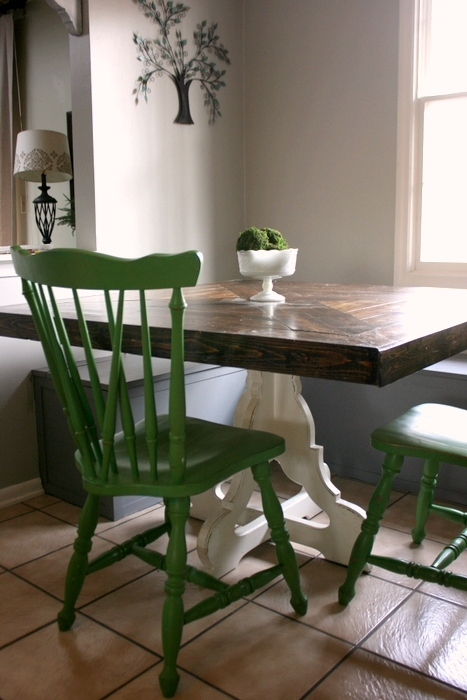
After the banquette, I made a round kitchen table top, which helped the flow around this part of the kitchen.
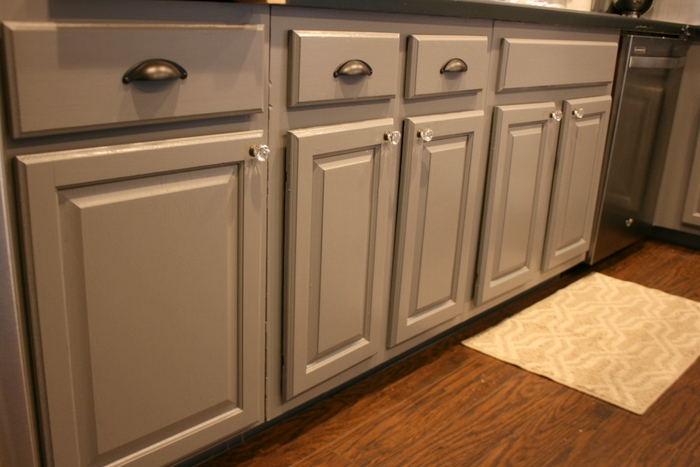
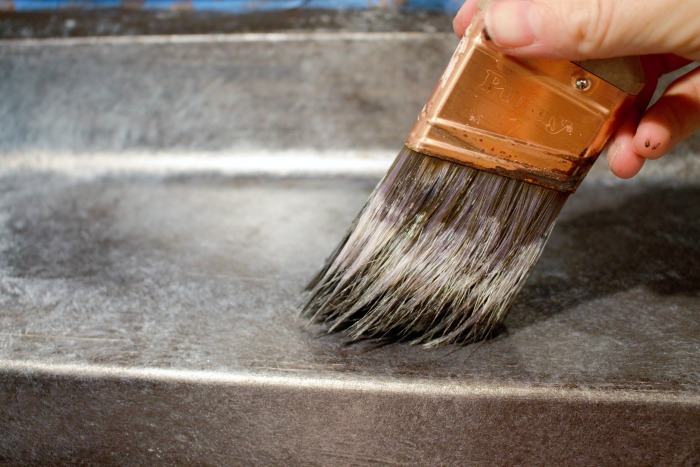
I used General Finishes Milk Paint to completely update the kitchen cabinets. New hidden hinges, and hardware completed the updated look.
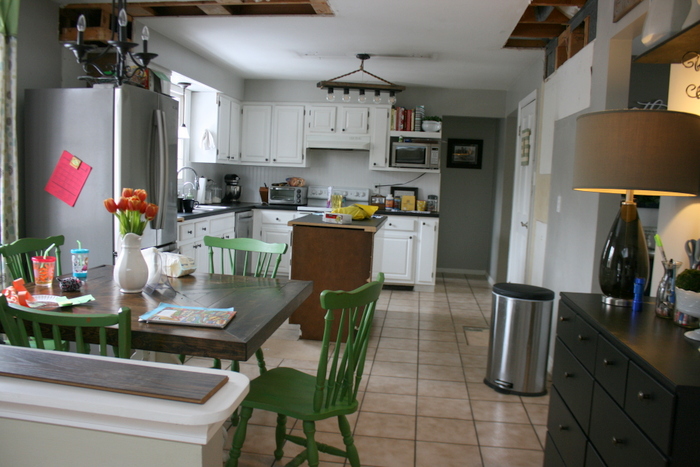
You’ll notice in this picture, we also put in a laminate floors. The floors completely transform the look of the space!! Somehow they didn’t get their own blog post, but I love them!!!
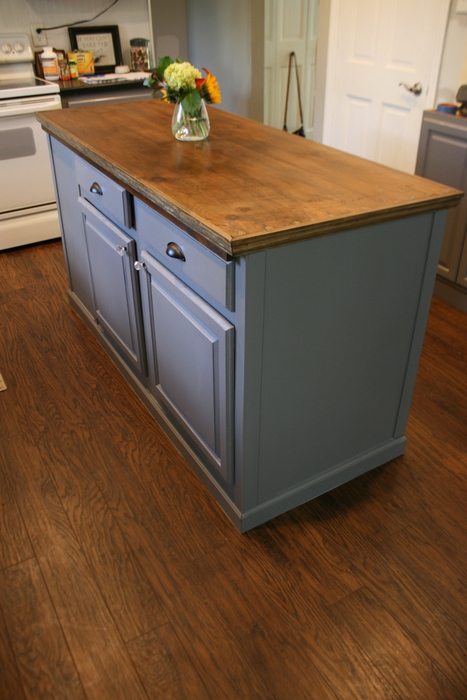
Once the cabinets and floor was complete, I used the cabinets from the peninsula we removed and built on to them for a custom kitchen island with a reclaimed wood top. I love this how this piece turned out!
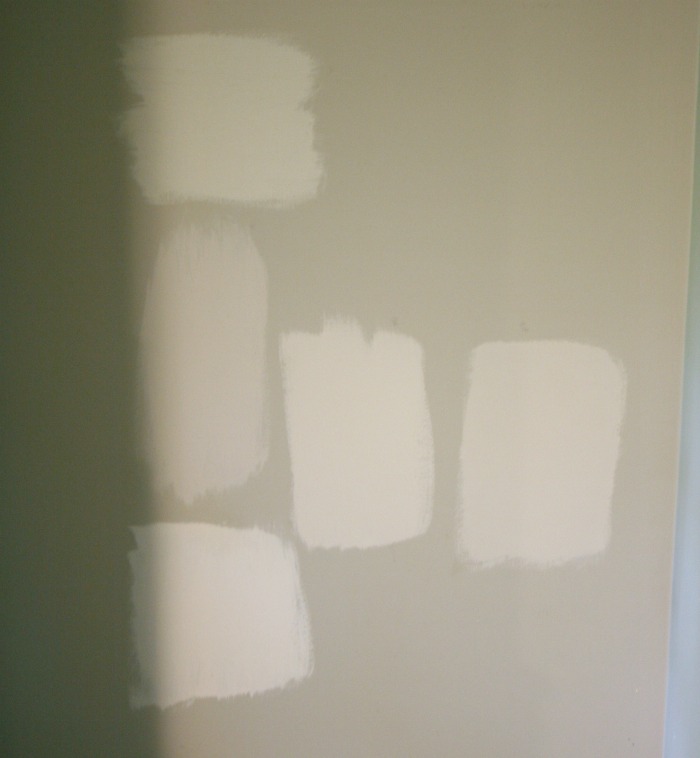
Next up was painting, both the walls and the ceiling needed a fresh coat after all the demo going on. I chose a lighter warm gray which brightened the space up so nicely.
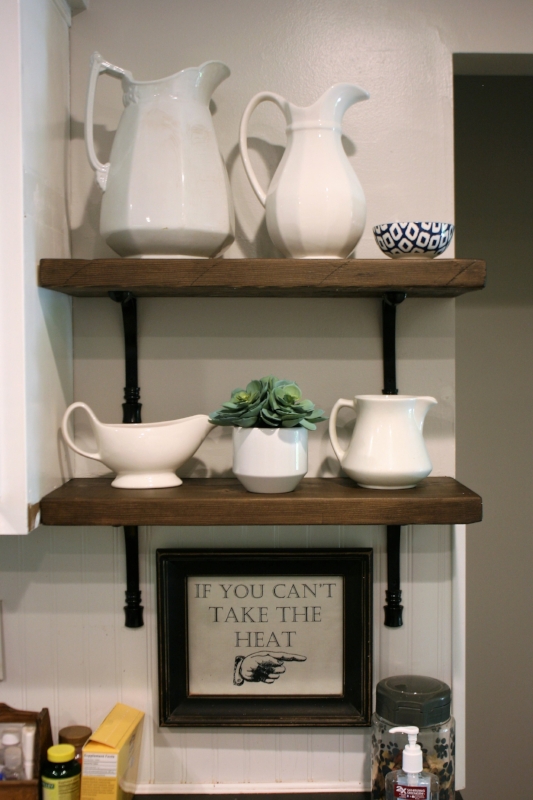
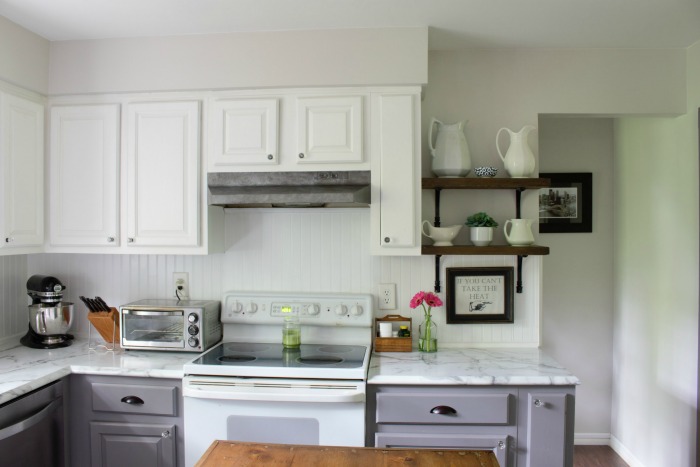
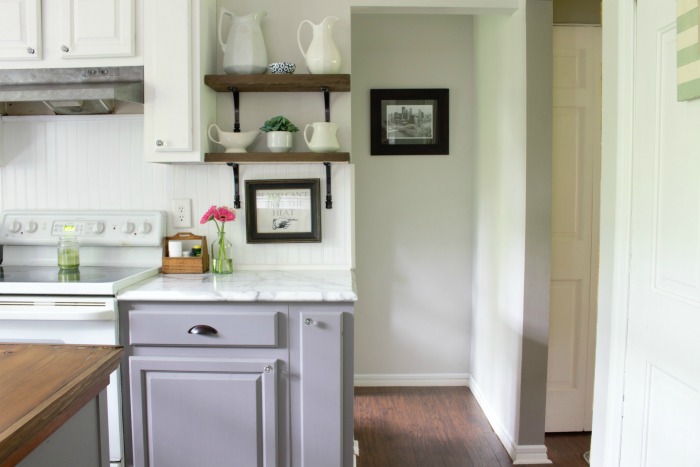
After moving the microwave and the cookbooks to the island, I had an empty wall space, to fill it I added these open shelves for a little spot of decor (and a perfect place for a few ironstone pieces). The thick wood planks and brackets make these the easiest to make and they really finish off this little space.
The white range hood was looking a little dingy, so I updated it with some metallic paint! It was a quick afternoon project, that really made a difference.
And after all of that… we have a finished kitchen!! We had an electrician install can lights in the ceiling which brightens up the space so much. It also lends to making the space look bigger since there is nothing hanging down from the ceiling.
We chose to get laminate counter tops with the ideal ogee edge, and I LOVE THEM!! They look like marble for a fraction of the cost!! They brighten the space and make it look so polished.
We may get a new stainless oven/range at some point, but for now the white one works just fine, so it’s staying.
This little corner is my new favorite.
The kitchen has a much better flow since we moved the fridge to the other side of the room. We originally wanted to knock this wall down and open it into the dining room, but without much expense (and moving some duct work) it was not going to happen. So with a new set of 12″ deep cabinets it becomes the new pantry/desk area of the kitchen.
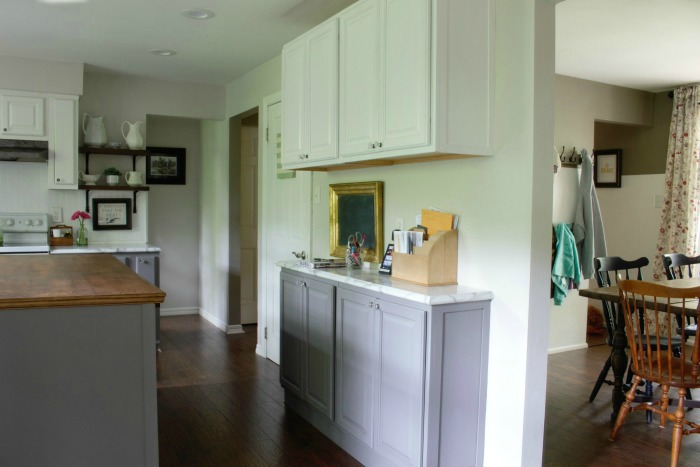
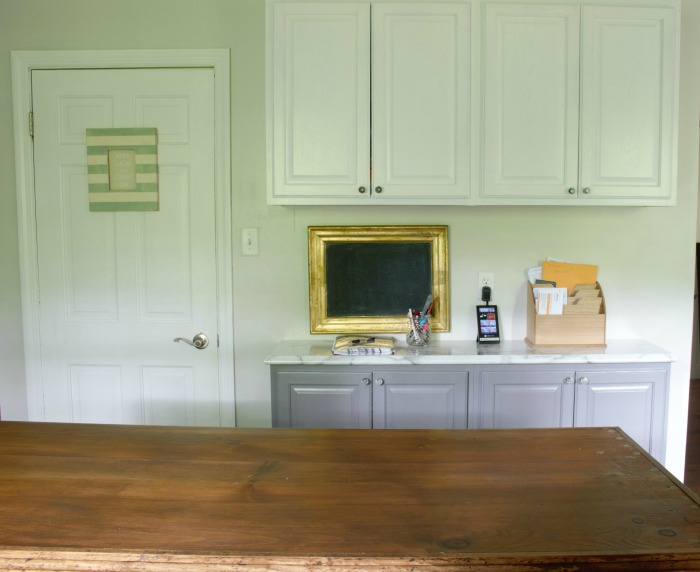
This black dresser/buffet has lived with us for a long time now, and I think a little black is just what every room needs to ground the space. I shopped the house for some new decor to bring into the kitchen, and this fake Van Gogh brings all the colors together just right.
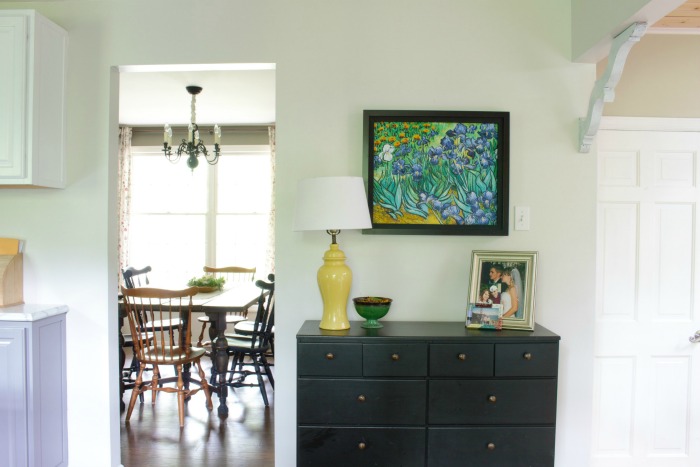
I made a new “bakery” sign for that corner which brings the wood tones all the way around the room.
Although it was a ton of work and time, I think we came in right about $5,000 for the makeover and we did it ourselves in about 2-3 months while keeping it functional the whole time. Phew! I’m so happy with how it turned out!
Until next time,
Jenni


Wow, what a great update. I love the improvements they’ve made in laminate countertops. Those new edges are really believable. The layout is so much more open now, love the island!
Isn’t laminate amazing these days?!? I love this new (old) kitchen!!
What colours did you use on ypur cabinets?! So Gorgeous!
Thank you! This was Snow White on the top, and a mix of half and half Driftwood & Snow White on the base cabinets. This was done with General Finishes Milk Paint.
I truly appreciate this post. I have been looking everywhere for this! Thank goodness I found it on Bing. You’ve made my day! Thanks again
You’re welcome!! Glad you found it!!